Easy Composites Ltd Arbon Fiber Airbox Pt 1
The Power Of The Internet
The internet is a fascinating place.
Besides providing a perfect safe zone for trolls and keyboard warriors to unload their mindset on others, the internet can be an endless source of information shared from all corners of the globe. This can be especially fruitful when trying out new projects for the first time. Stuck or not confident in the next steps? Google andYouTube are you friends. The trick is how to sift through the information overload to get what you need.
For as long as I can remember, I've wanted to play around with composites. University provided an opportunity to try my hand, but those times were always under the careful guidance of an instructor. Never had I attempted to construct something myself from start to finish.
A goal with Project Rough, my ER34 Nissan Skyline, is to try and improve various skillsets whenever possible – composites being one of them.
But before diving intohow I built a custom airbox for my car, I should fill you in onwhy I attempted this in the first place…
I wanted to try and work with both fiberglass and carbon fiber, because ultimately I'd like to be able to produce various parts in carbon with high quality results. I knew it was impossible for me to get it spot-on the first try, but I would try my best to end up with a professional-looking result. Since the airbox is mostly hidden, I felt like it was the perfect thing for me to attempt first.
I decided to go with a method that didn't involve vacuum forming or autoclaves for two reasons. With advancements in technology, getting your hands on a suitably-sized vacuum kit and autoclave for small projects has never been easier, but I decided to go down the path that virtually anyone could, if they so choose to. This method is perhaps the least complicated, but it requires a lot of patience and dedication – more than I had imagined. I now fully understand why carbon fiber parts fetch such hefty prices.
To get an absolutely perfect finish with carbon fiber requires a lot of skill and experience, something I had none of. The trick is not to give up – you have to keep trying. Yes, the first (and maybe next few parts afterwards) may not be perfect, but with each go you improve leaps and bounds. Hopefully I can show you my progress as Project Rough continues.
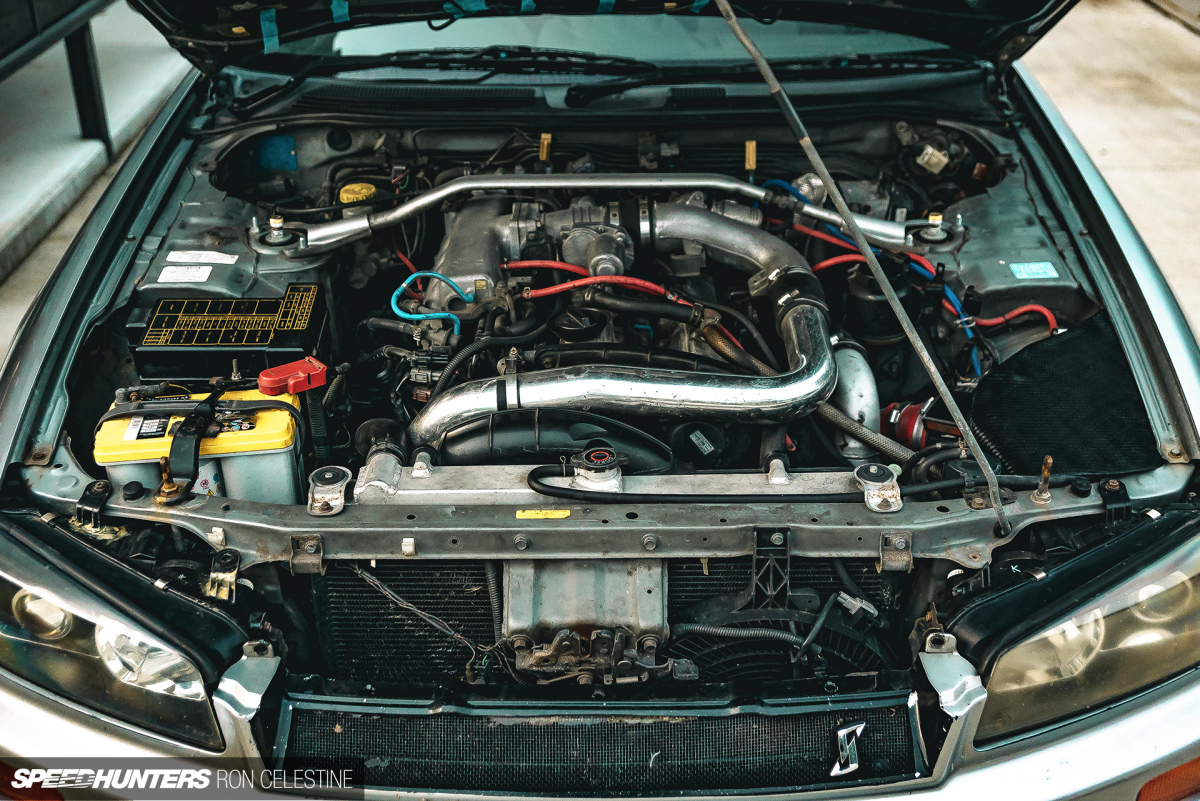
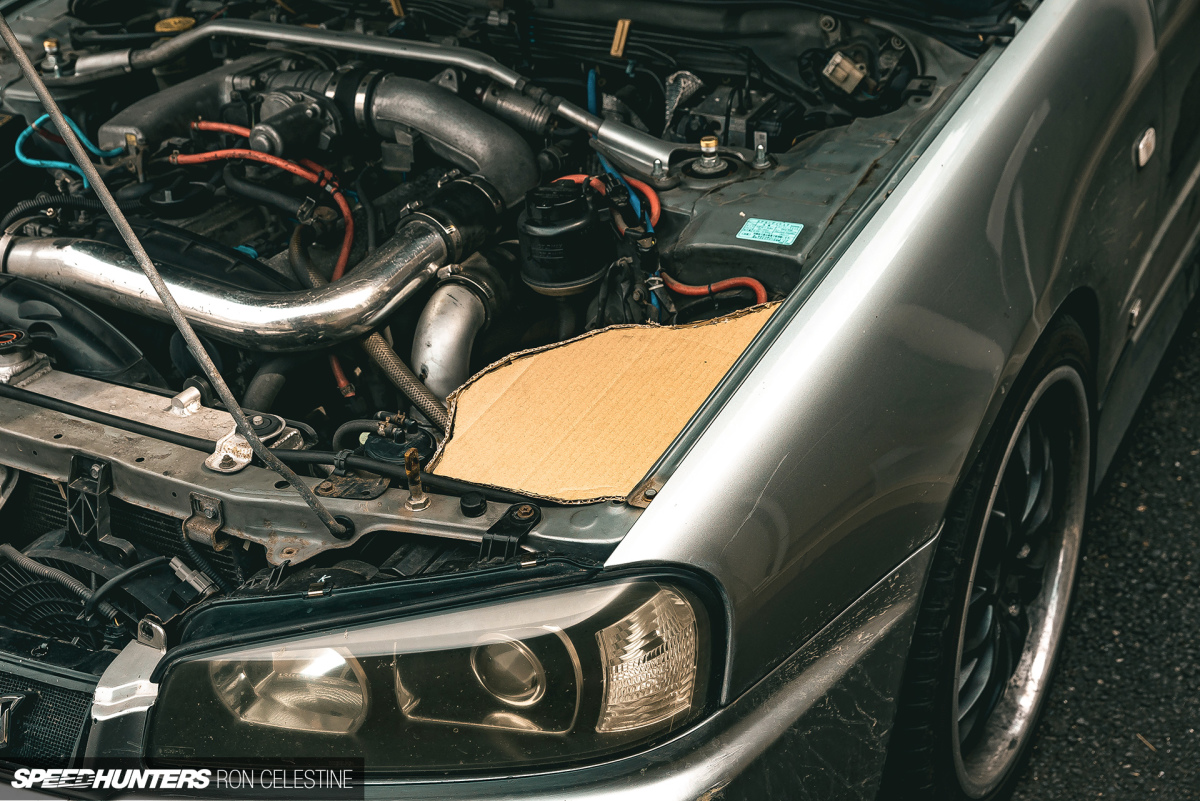
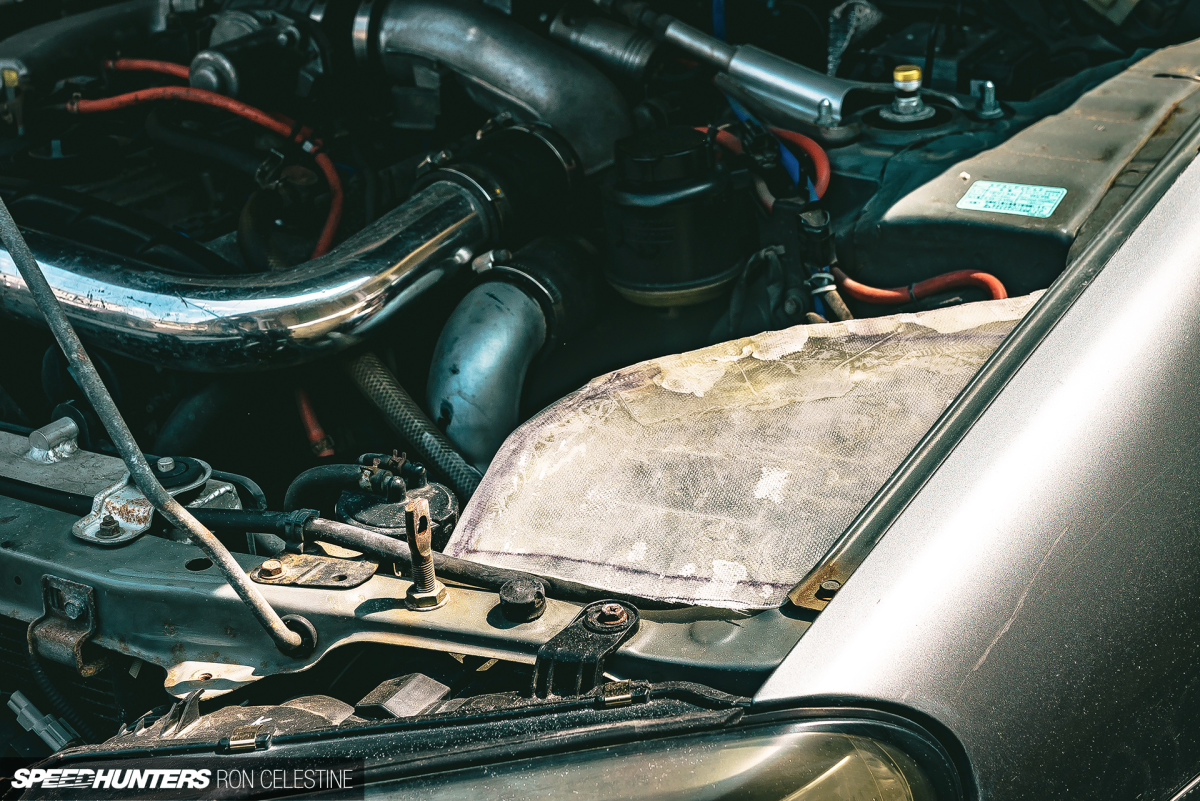
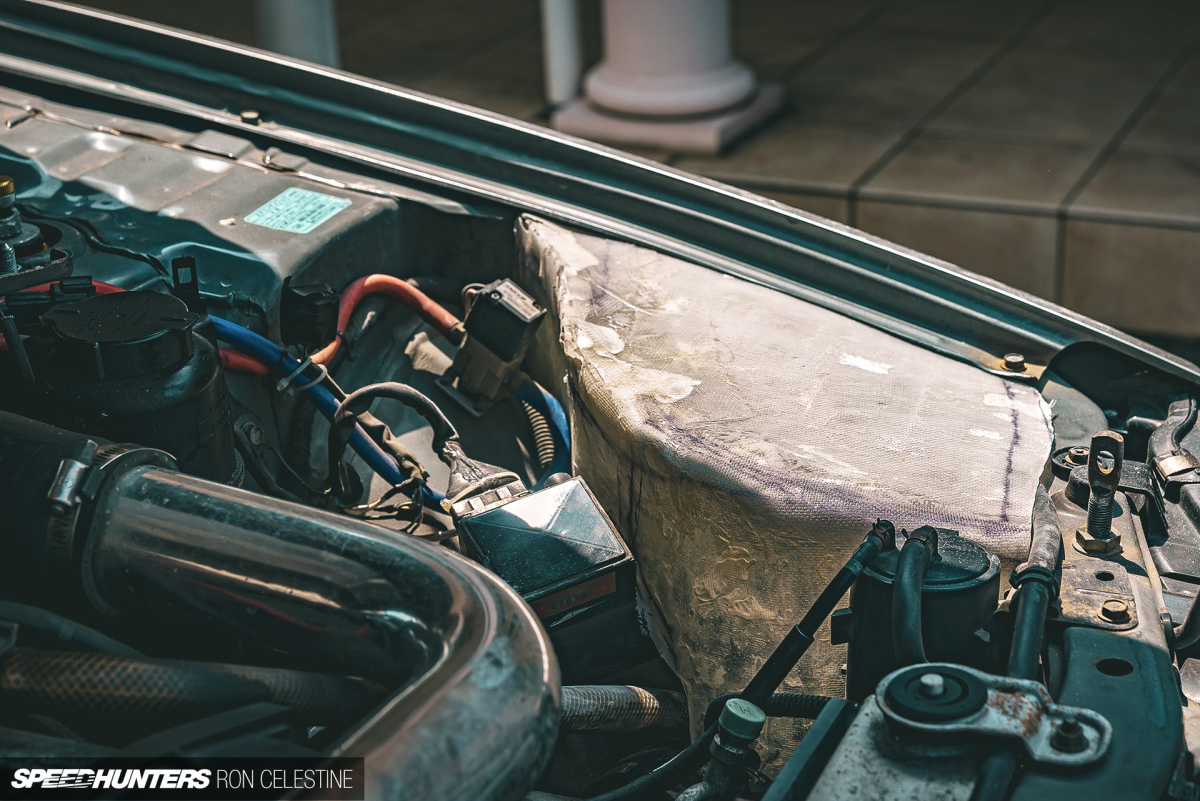
When I picked up the car, a corrugated plastic separator of sorts had been fitted in the engine bay by the previous owner. The theory behind it is that once the hood is closed, it would become the top, sealing the intake off from the rest of the engine bay in the hope of sucking cleaner and cooler air into the T04E turbocharger.
I suppose it worked, though I would question the efficiency. I really wanted to try my hand at improving things with a custom DIY carbon fiber/fiberglass airbox. But how?
How Hard Could It Be?
This is where the power of the internet, determination, and some ignorance comes in.
After countless hours of researching and watching different methods, I came upon a video where a special effects wizard creates body kits from scratch, and discusses almost the entire process. Two hours of screen time later and with more confidence that really made any sense, I was ready to dive in.
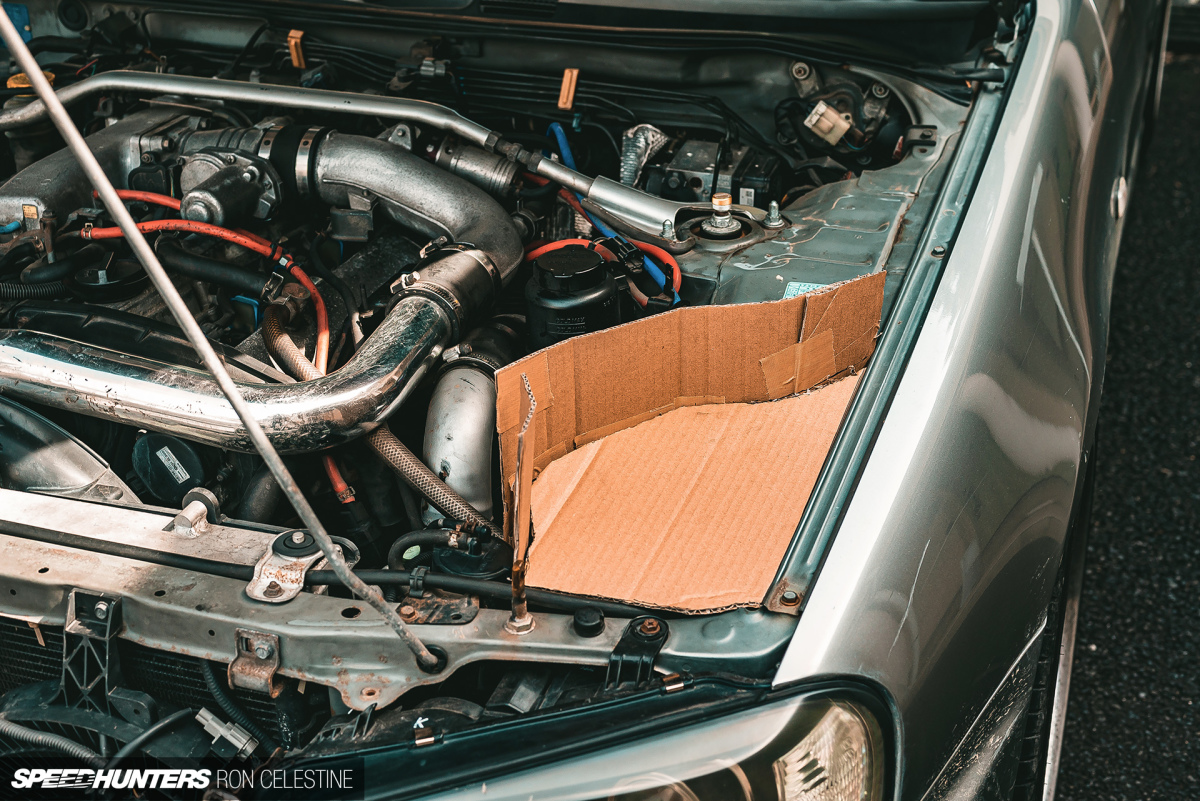
To form the basic shape of the airbox, I used some old cardboard boxes I had laying around.
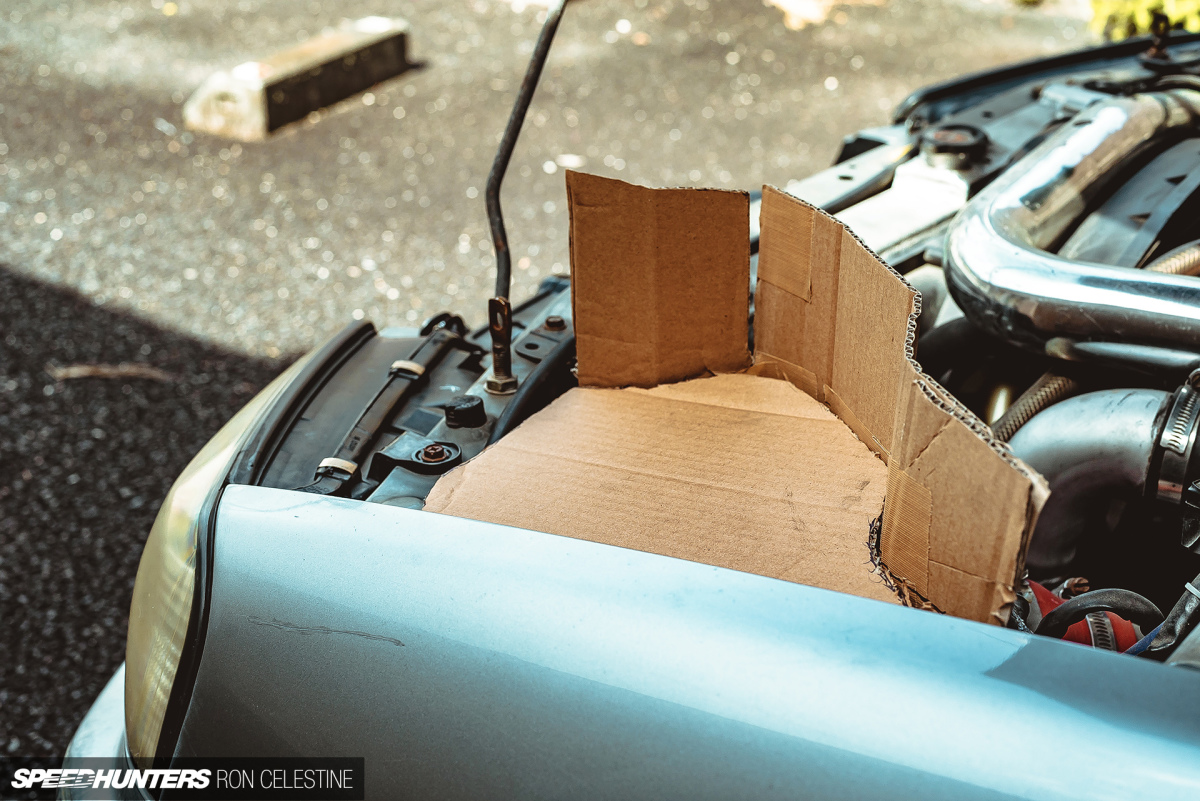

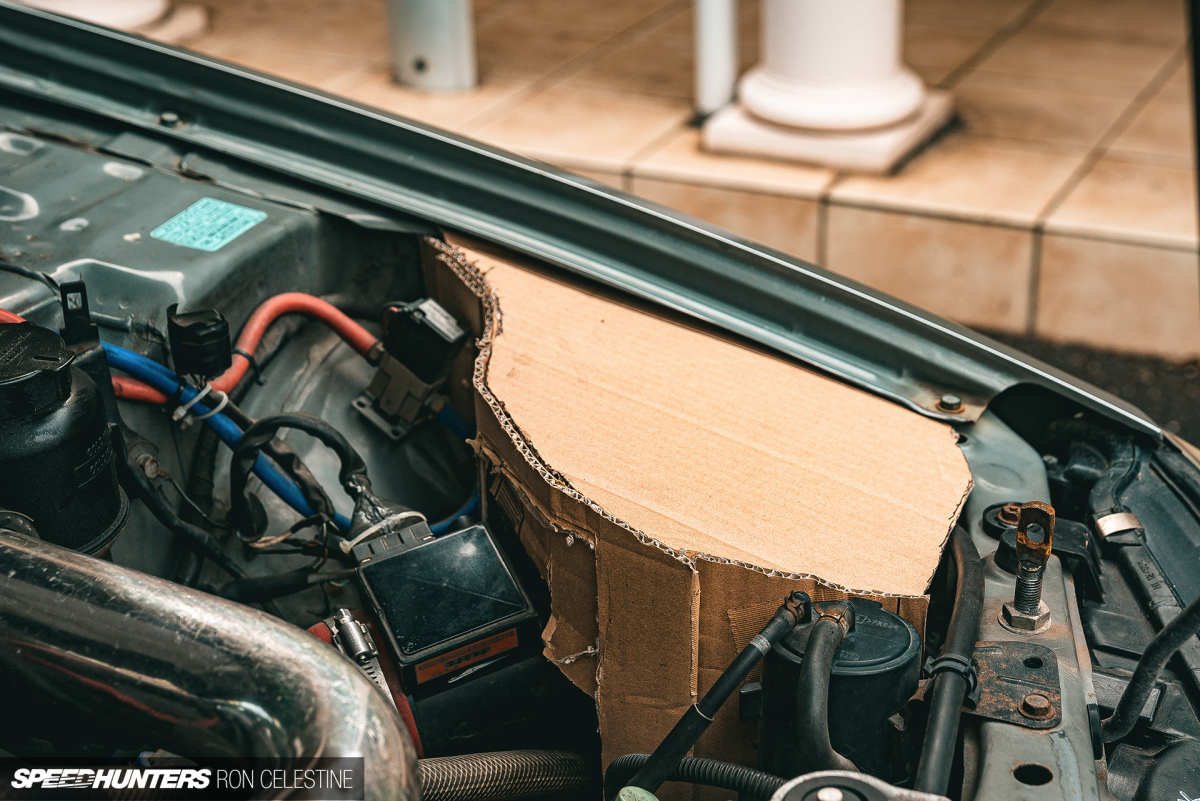
My thinking here, was that the cardboard would be easy to manipulate and strong enough to take the weight of the clay I'd be laying over the top to form the shape of the airbox, without deforming. I could also make extra supports wherever needed.
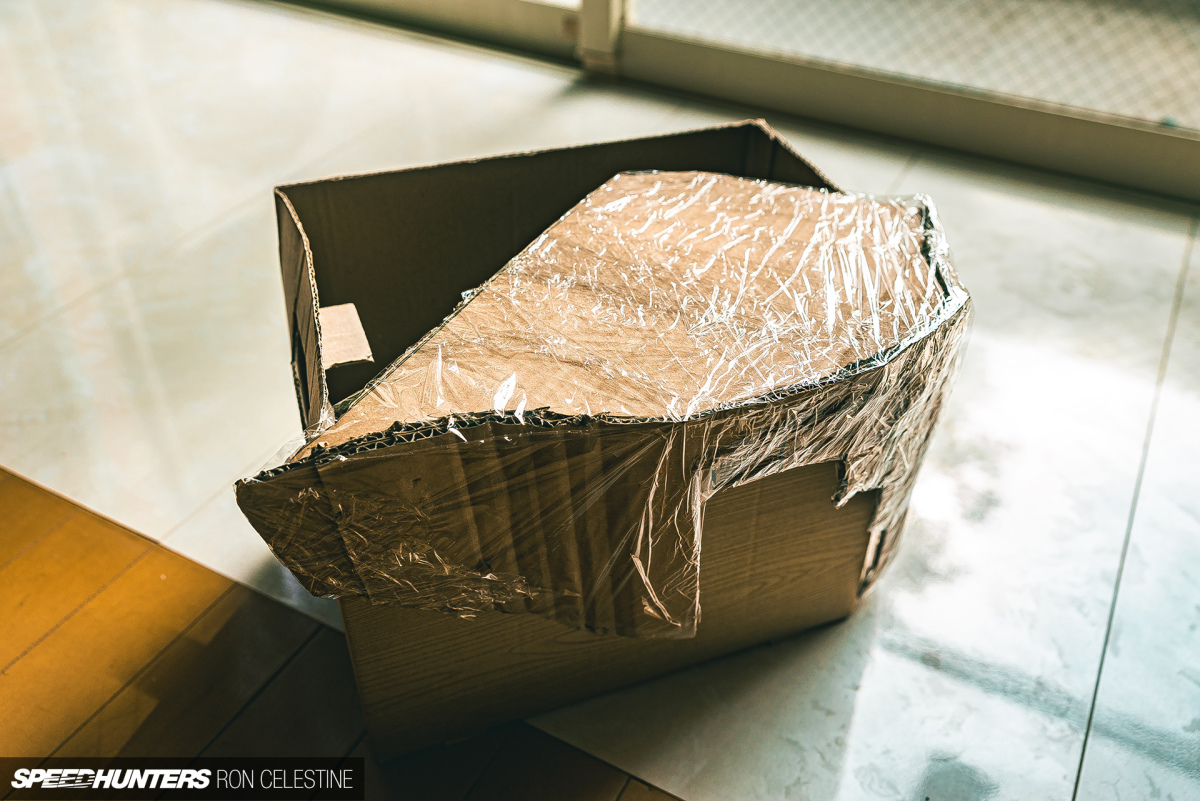
With the basic form pretty much the way I had envisioned it, I covered the cardboard in plastic cling wrap to protect it from the clay's dampness.
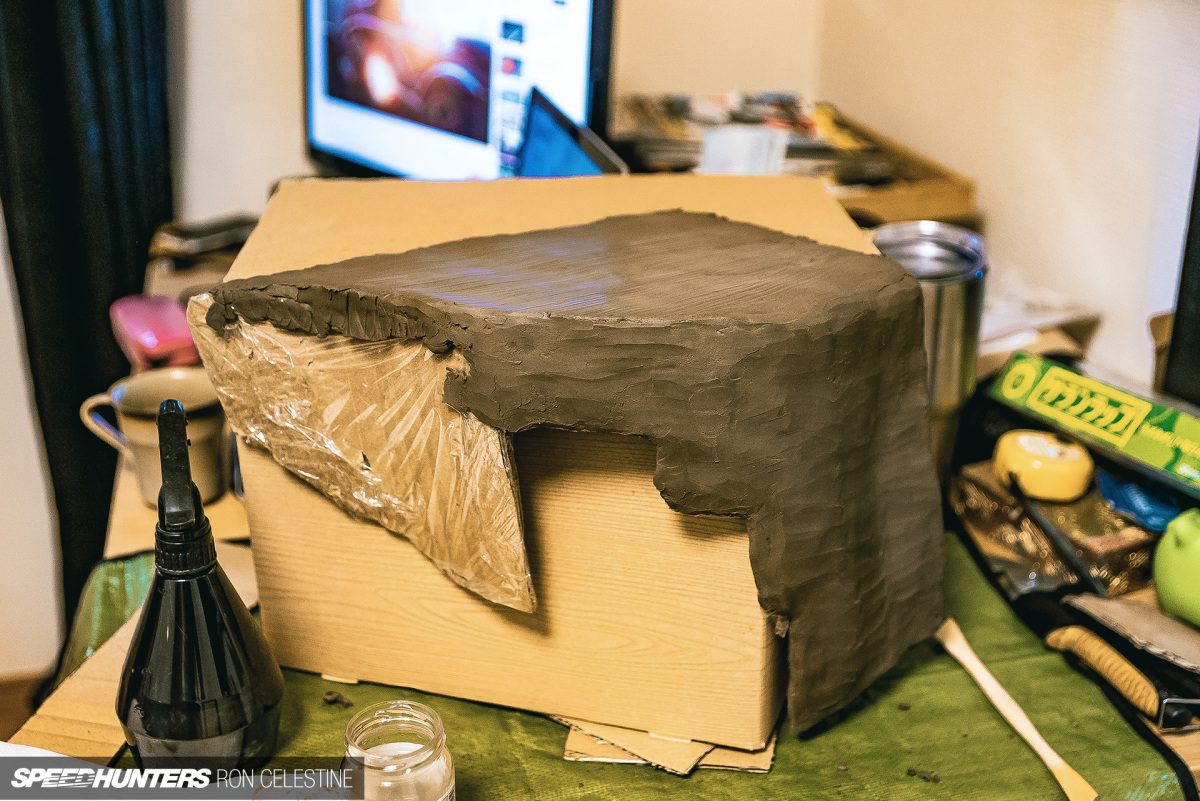
Next, I had to channel my inner sculptor in order to create the mold. You really don't need to have expensive clay for this step, though it would help with the sculpturing I'm sure. The clay I bought said it was good for beginners, and honestly it was.
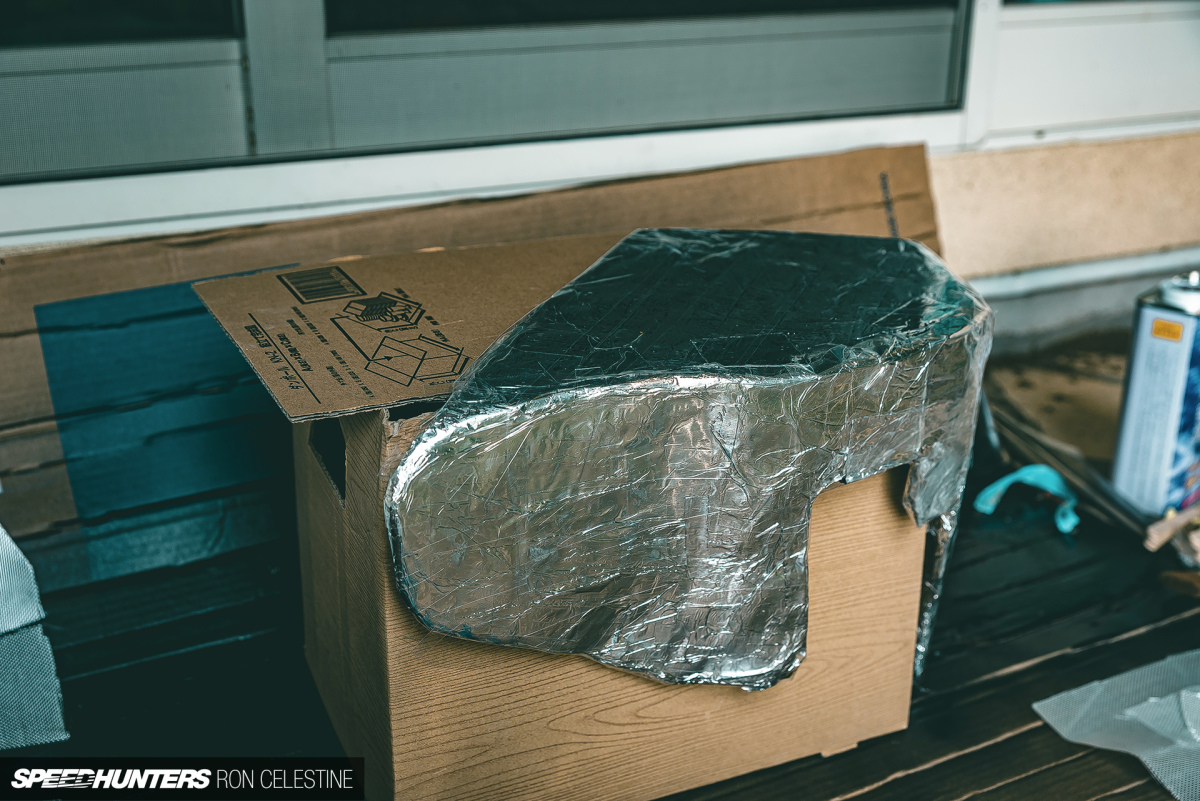
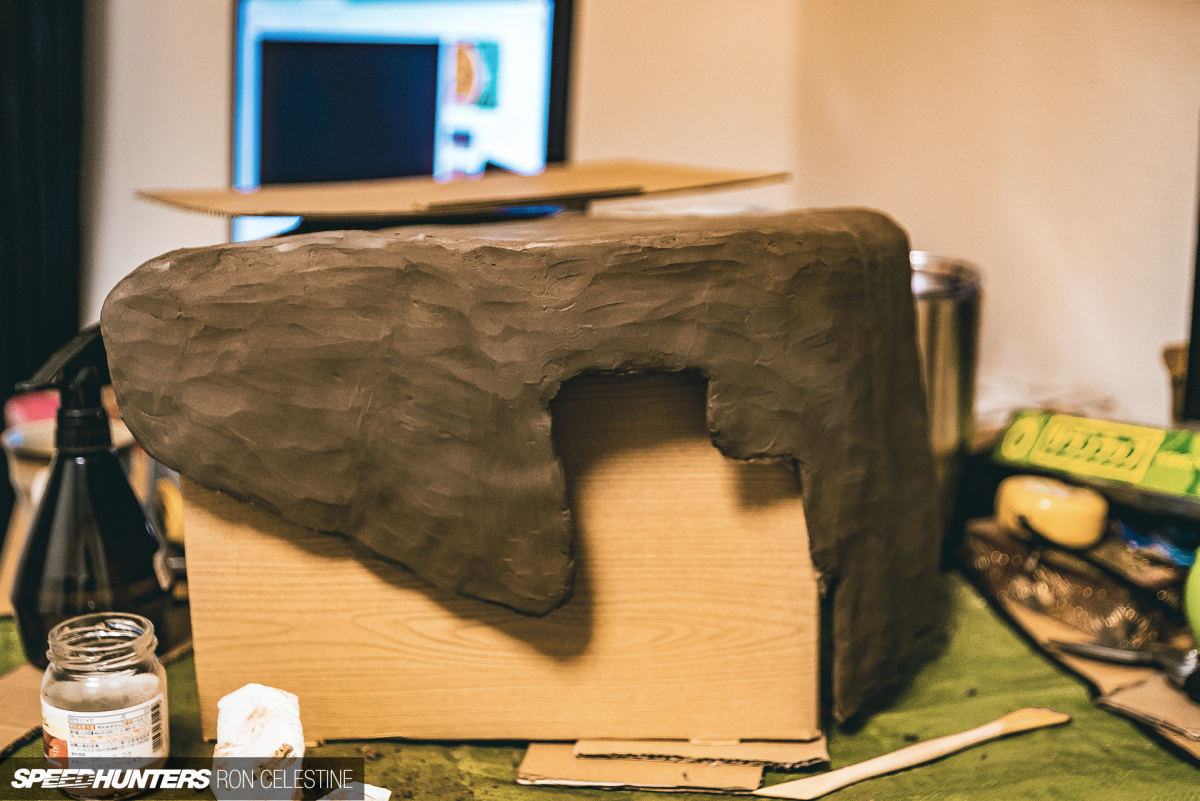
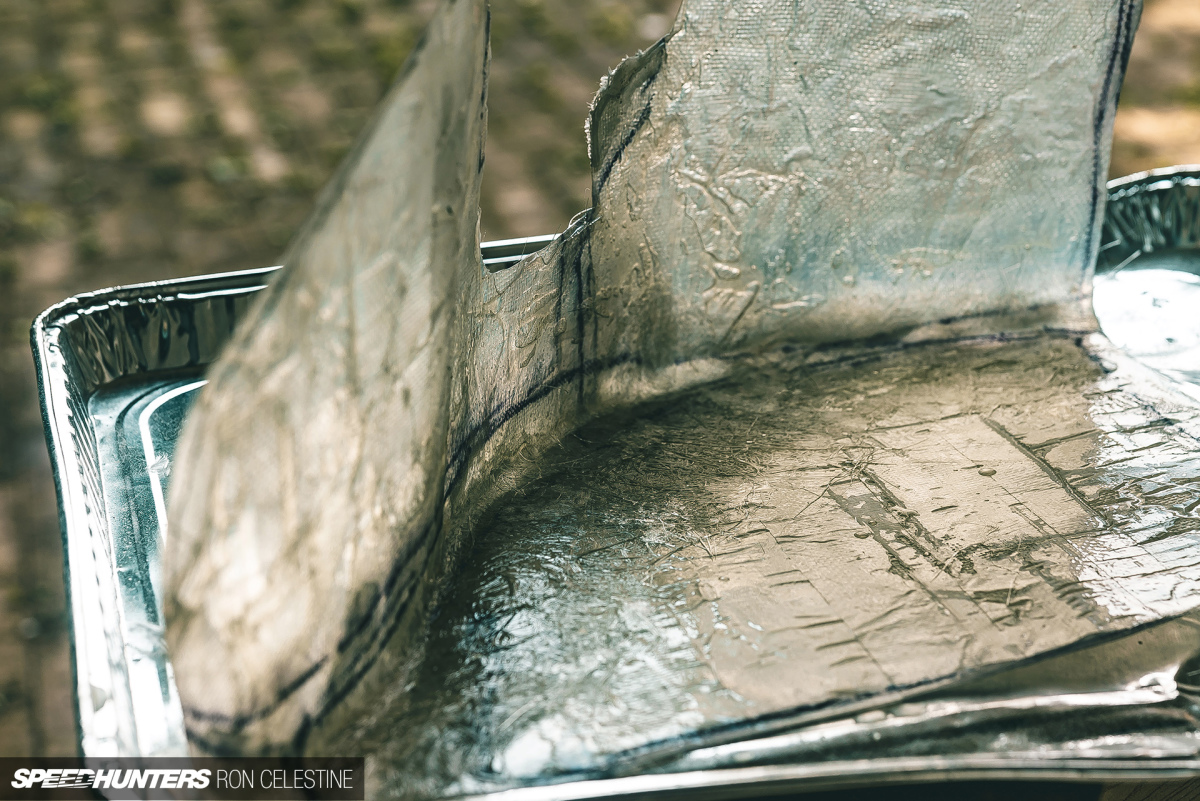
The next step in the process was to wrap the clay in aluminium foil and then add packaging tape on top of the foil. The foil makes for a good barrier between the epoxy and clay, and the tape helps break the fiber mold away from the foil.
The added bonus of the foil is that it keeps the clay moist so it can be reused for your next project. The drawback is you really need to take your time to smooth everything out or you will have to spend more time in the finishing stage. It may be a bit more expensive, but using aluminum tape on top before laying down the packing tape could help create a nice flat surface.

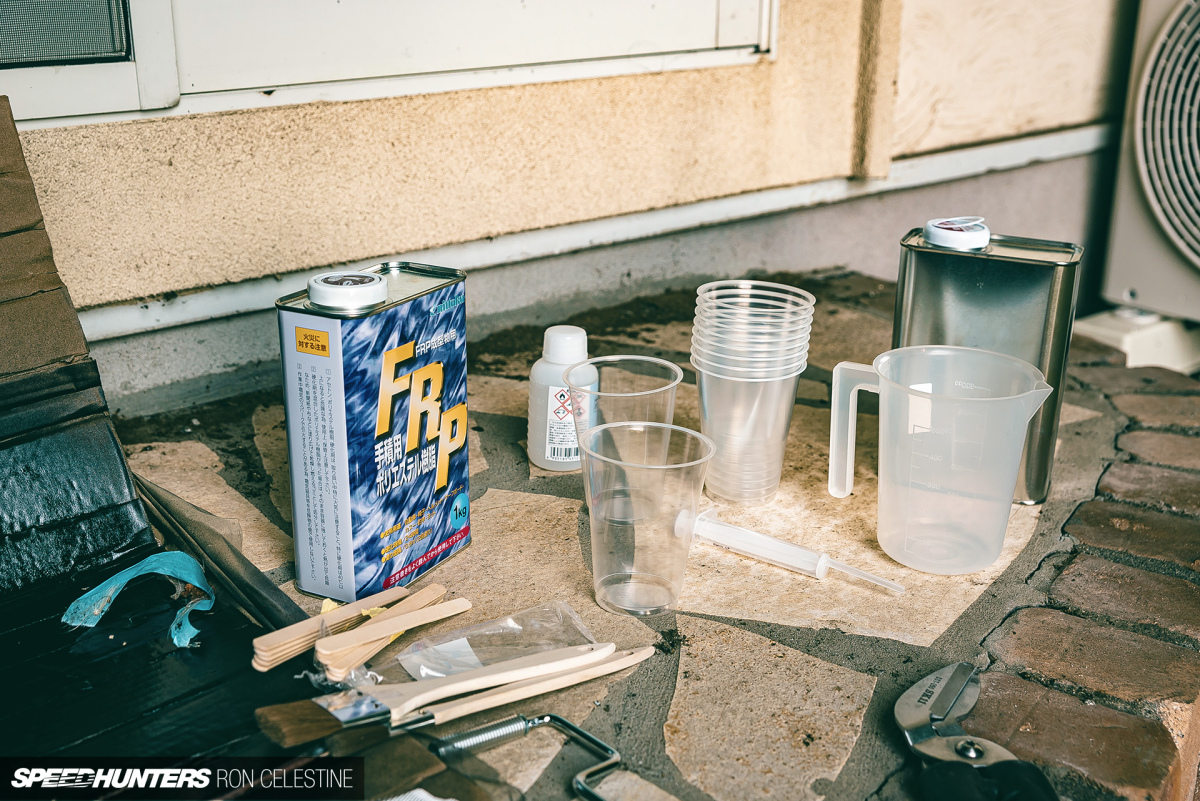
The first and pretty much only 'oh sh*t, I may have bitten off more than I can chew' moment came when I went to figure out the resin-to-hardener ratio. The guy in the video had neglected to mention the ratios he used. A quick look online revealed that most kits come with clear mixing ratios, but the product I had got my hands on didn't, thus I was flying blind.
I tried some math using a calculator I found online which ended up causing the exothermic reaction to go a bit out of control, and it was legit terrifying. Remember to keep a good amount of acetone to neutralize the reaction and a respirator on hand for times like this.
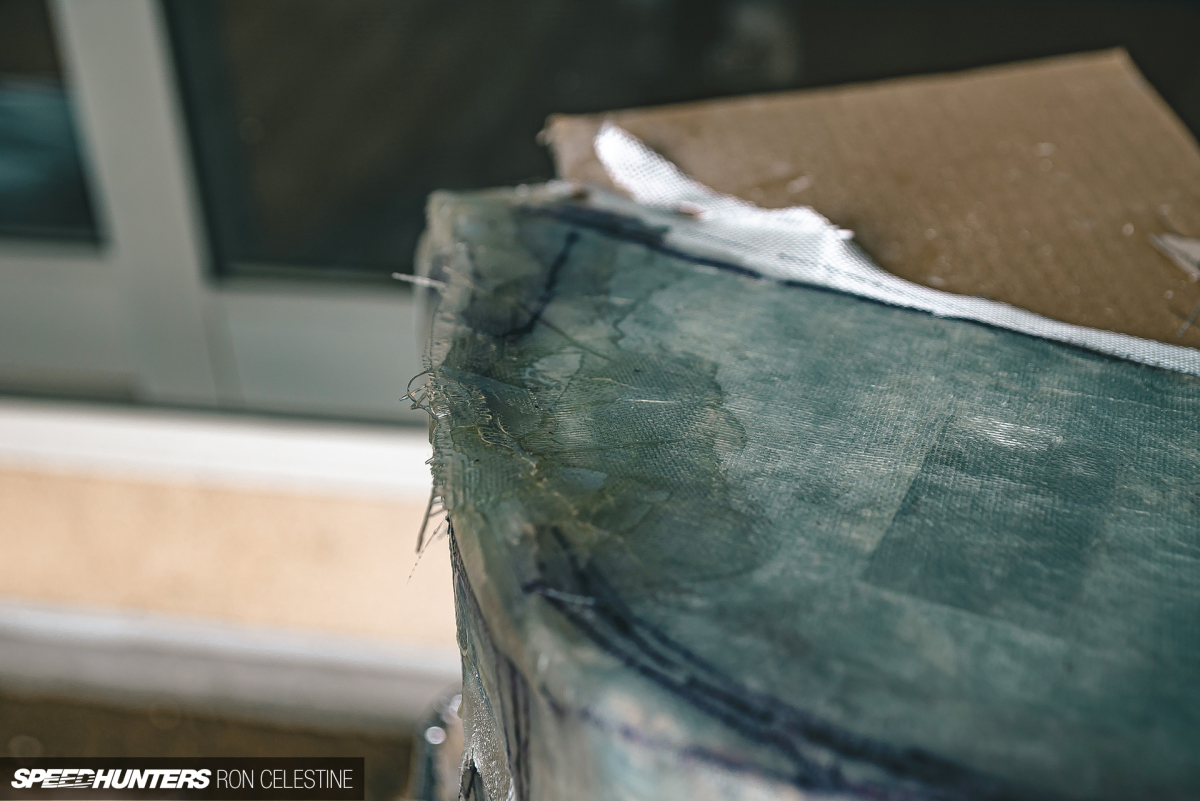
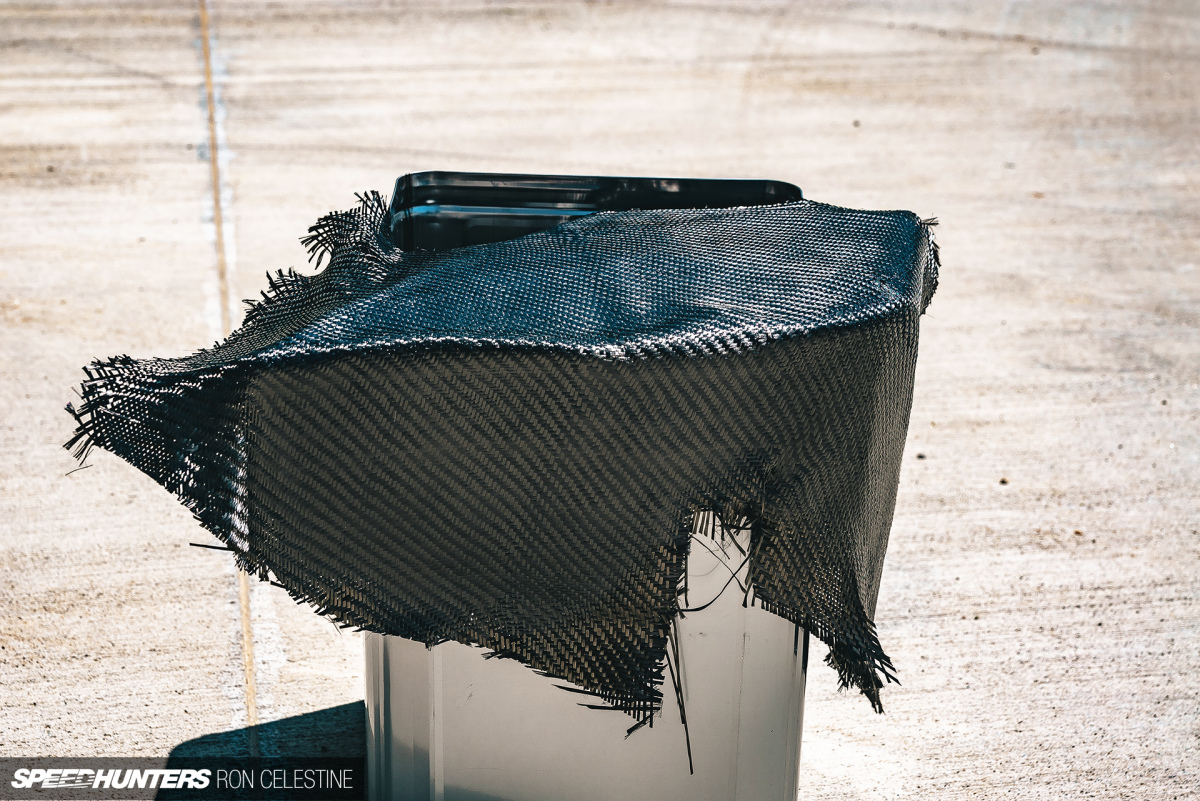
With the accident cleaned up and a newfound respect for what I was about to do, I tried again with a much smaller amount of hardener. In hindsight, I should have used even less to give myself more time to try and cover the the mold in one complete sheet of fiberglass instead of three individual cutouts. The result of this was a lot more time sanding.
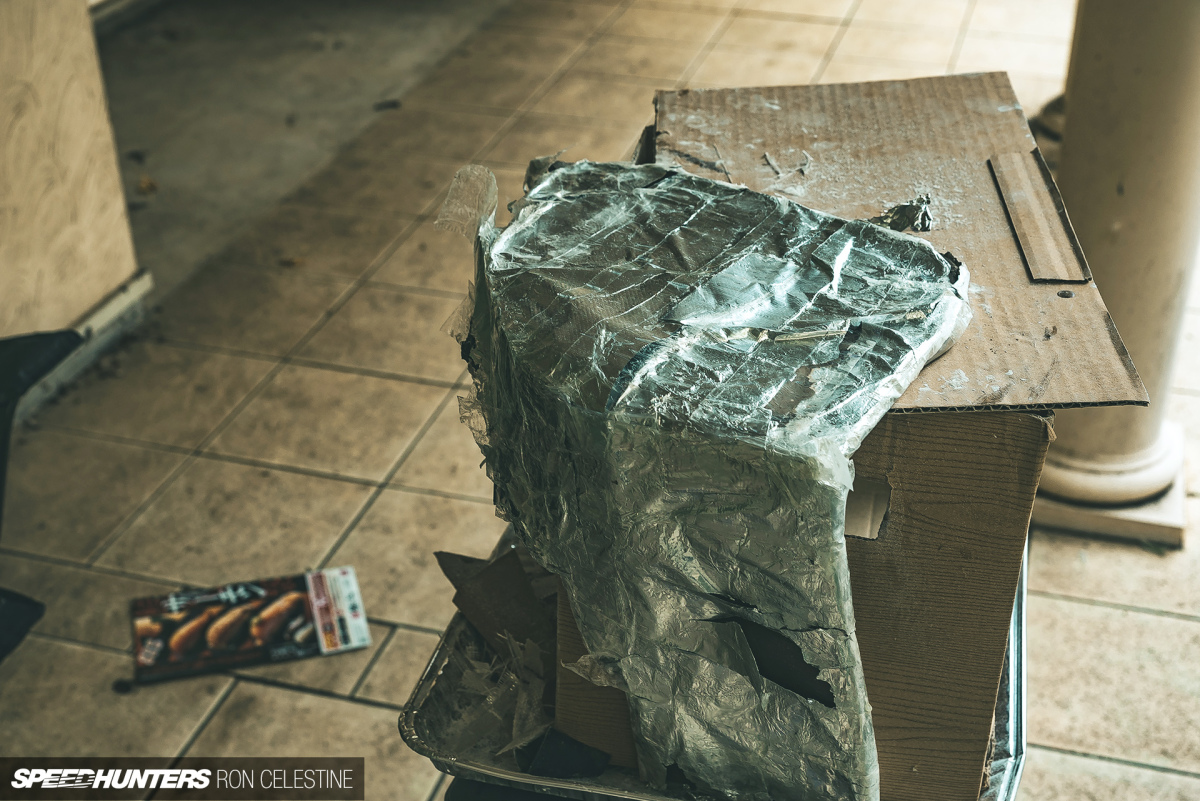
With the fiberglass mold coming away from the aluminum foil and packaging tape combo with relative ease, I finally was able to see the results.
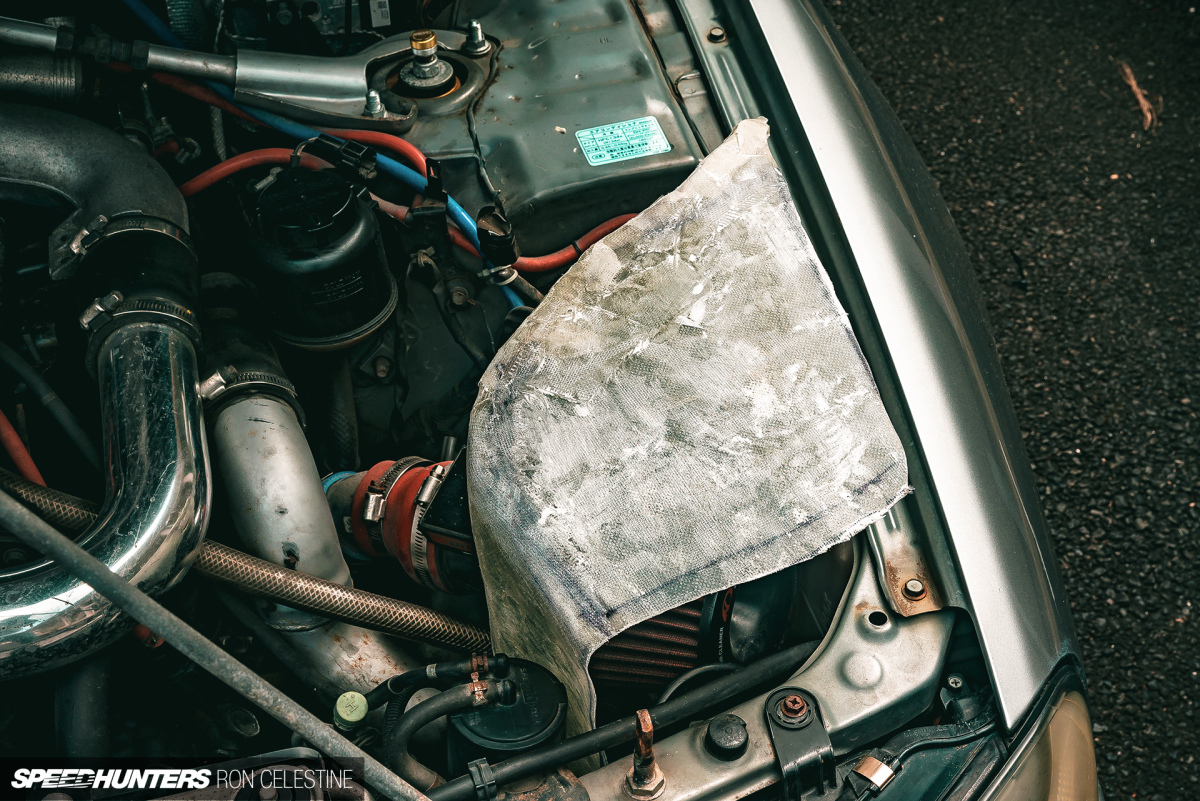
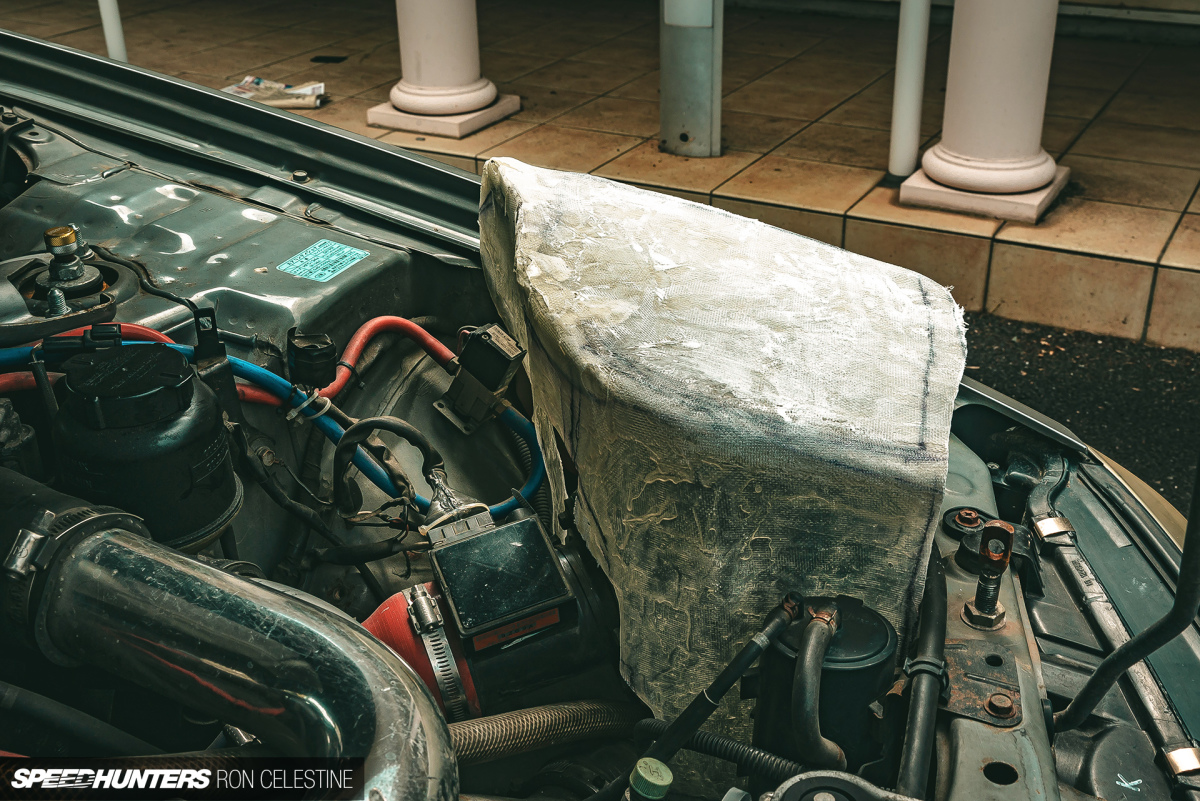
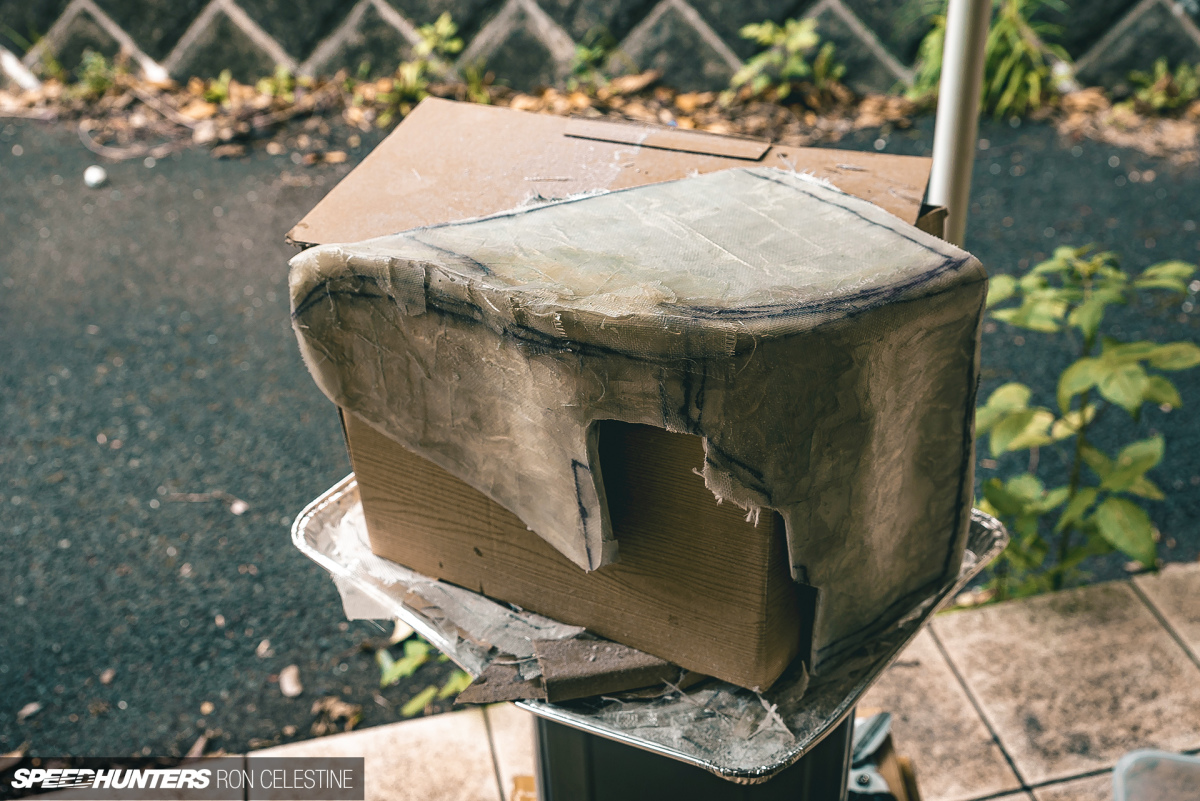
Erring on the side of caution, I had added more fiberglass than necessary to give myself some breathing room in case my mold shape was off. More sanding and cutting was going to be required because of it, but to say I was over the moon with excitement at the completion of this step would be an understatement.
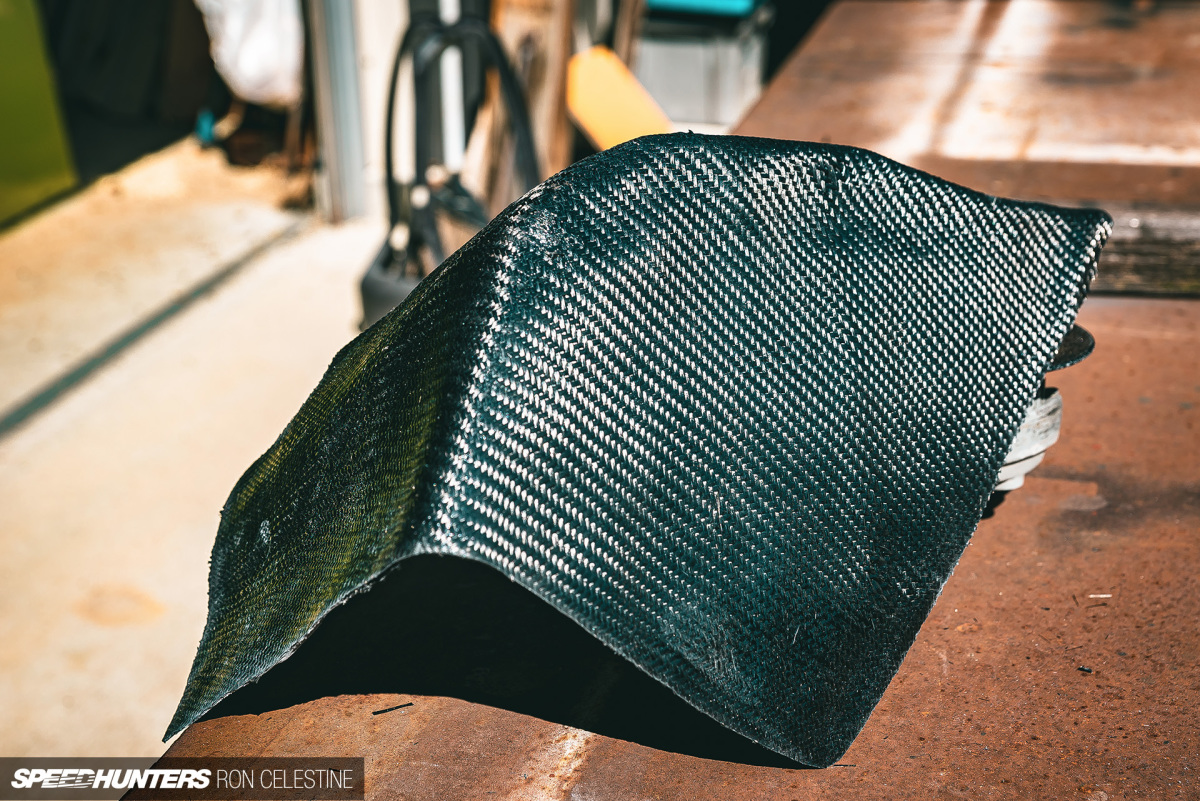
I strengthened the radius with chopped fiberglass before getting the overall fitment correct.
Perfect!
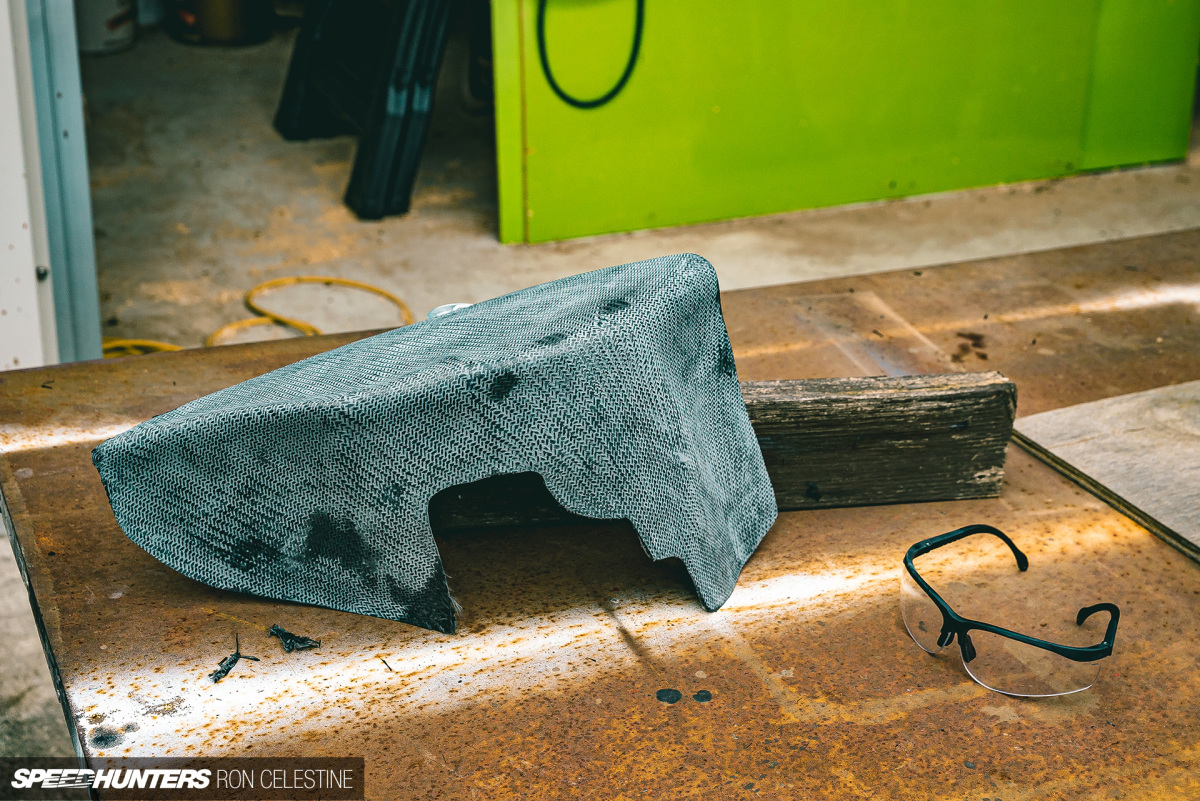
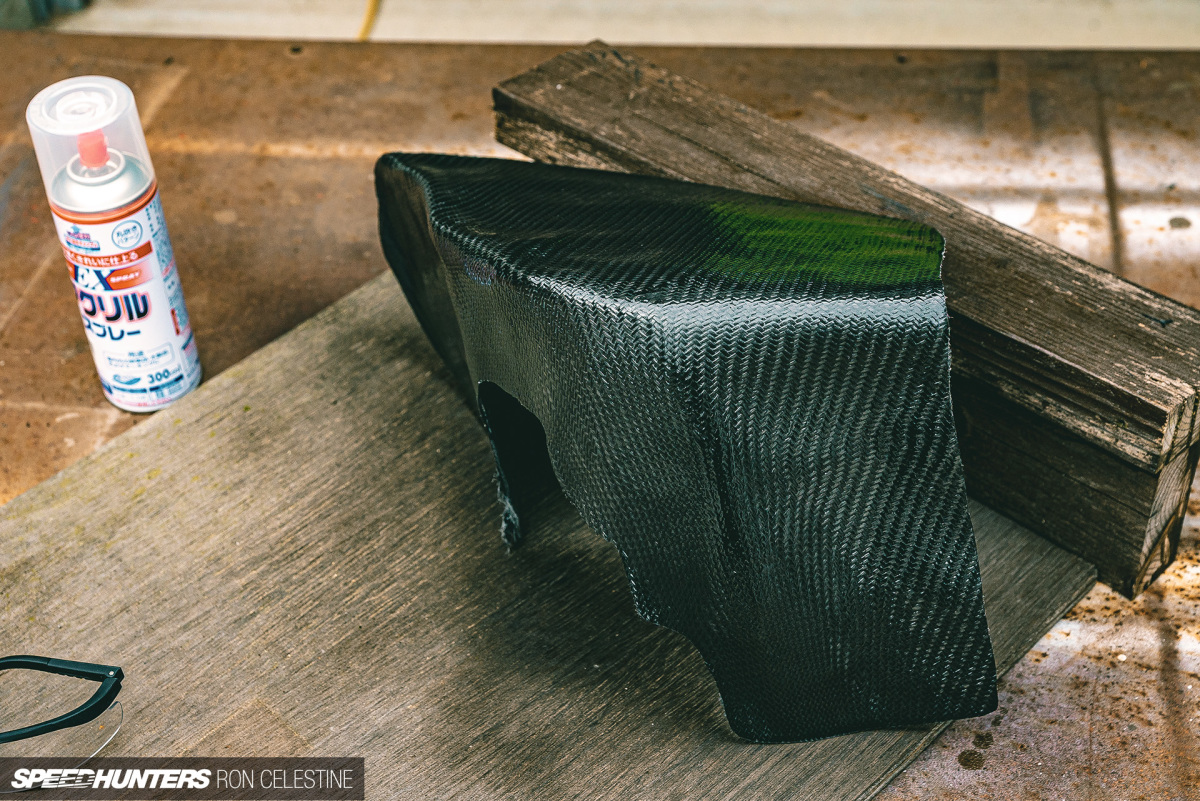
Besides wanting a carbon fiber exterior finish on my airbox, I wanted to add a bit more strength to the part, although the odds of this ever seeing any type of serious load is slim to none.
Learning from my earlier mistakes, I used magnets and a slower curing batch, and took my time adding the carbon fiber layers. At this stage it's important to cover the entire part in epoxy, something I thought I had done, but hadn't.
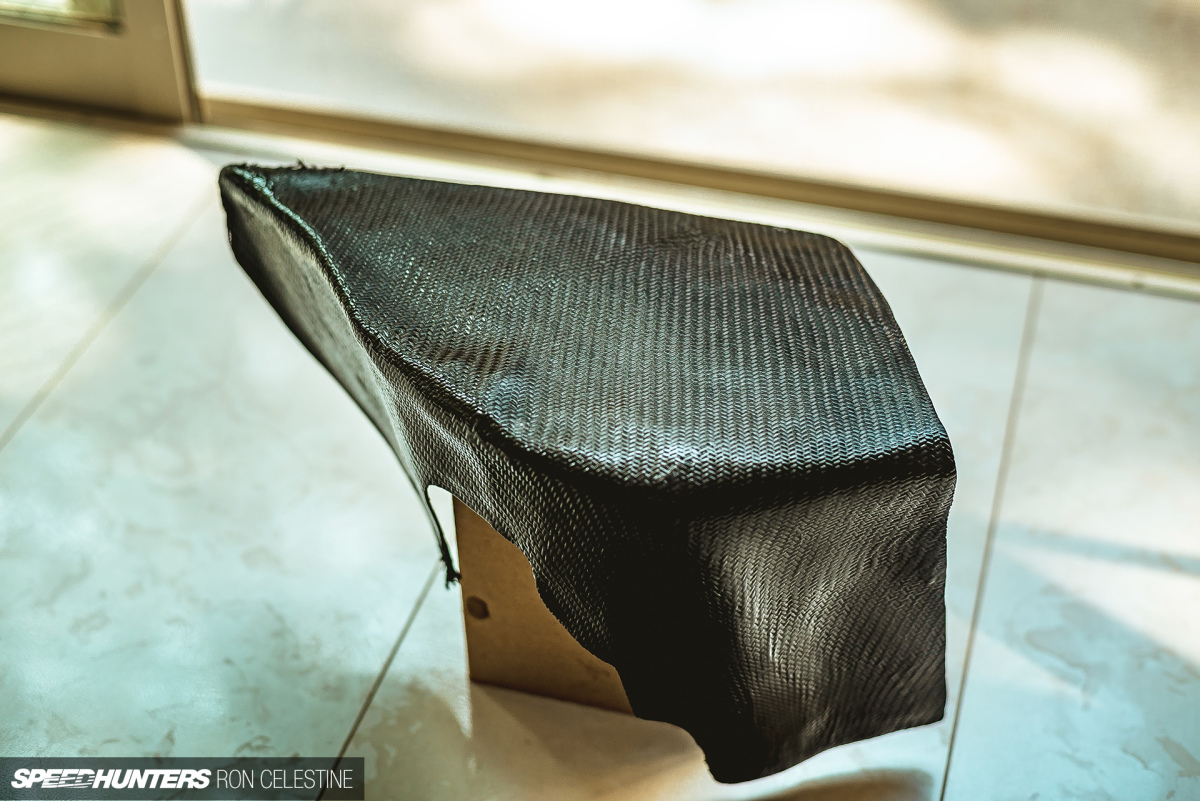
A few more layers of carbon fiber and some trimming later and here we were.
During my research, I saw a number of different ways to finish off the carbon fiber. For this project I decided sand the epoxy wax coat off, and then work my way up from 120-grit to 2,000-grit paper before applying some clearcoat.

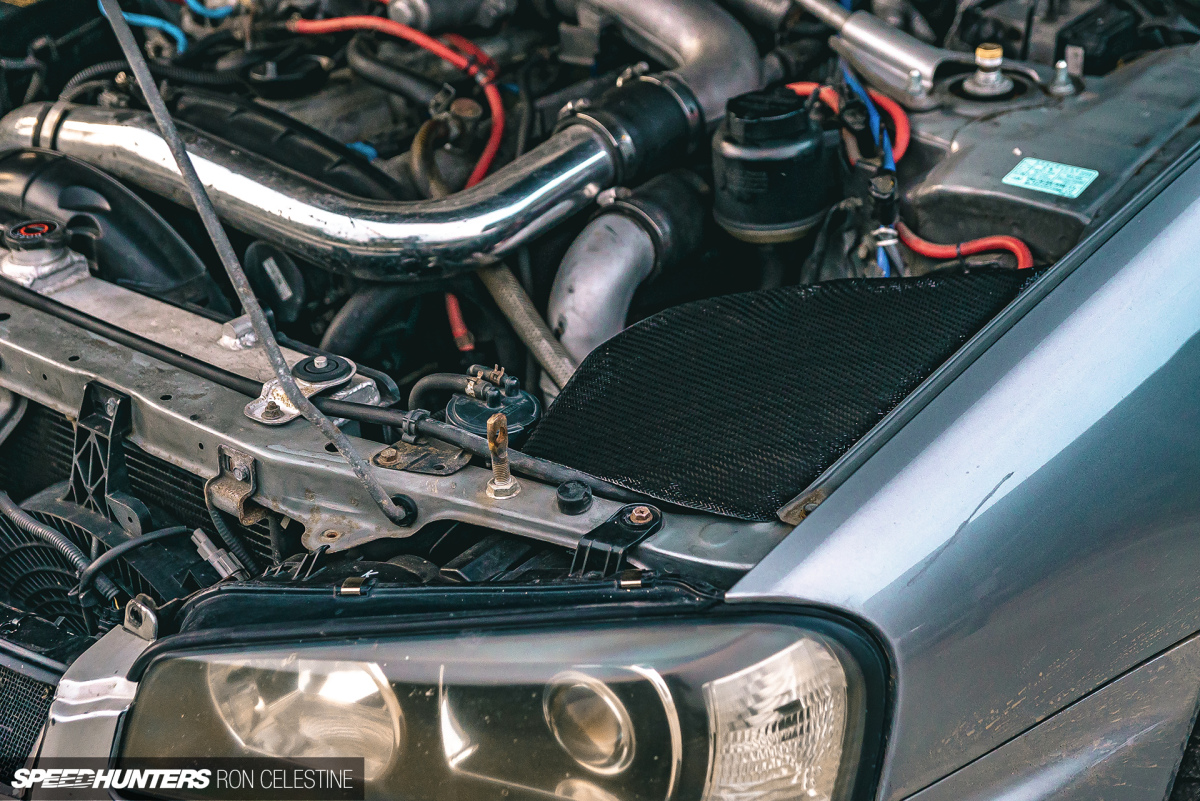
And here's the final result. I'm not sure I would have gone this finishing route again if I was to do it all over, but I could have spent more time sanding and used a different type of clear to make it really pop.
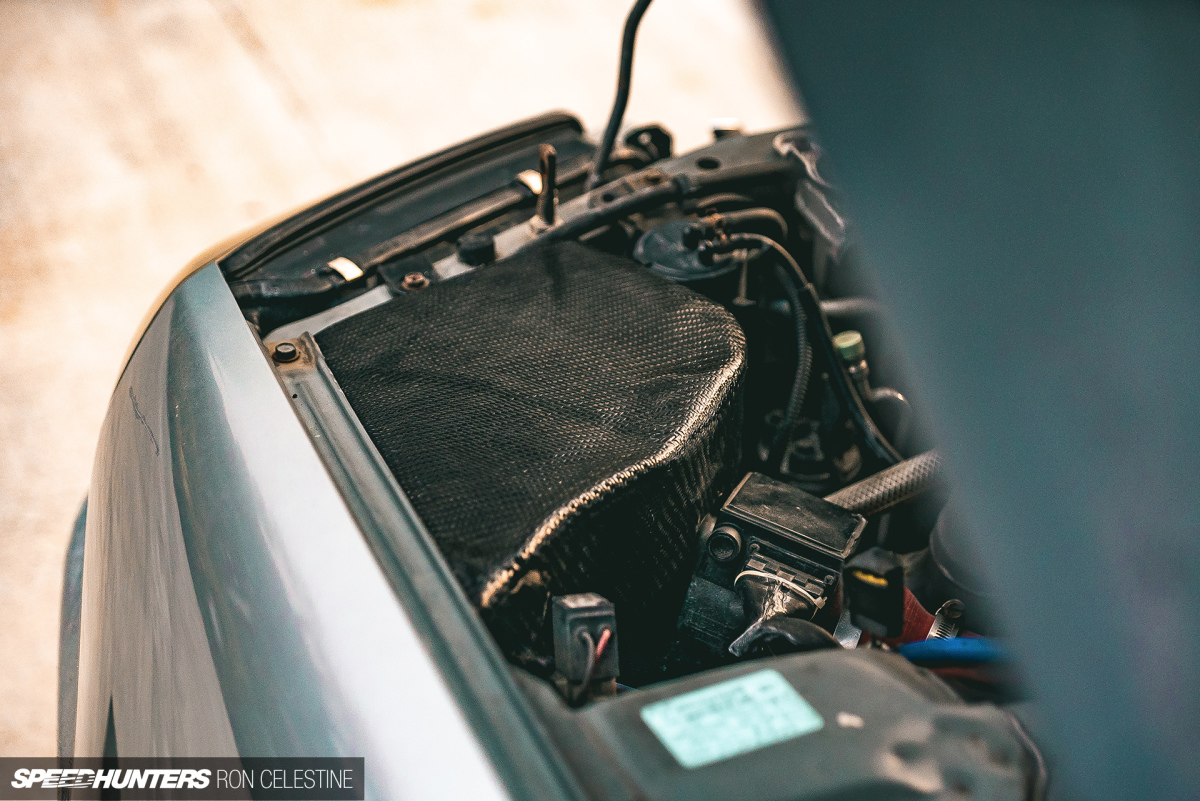
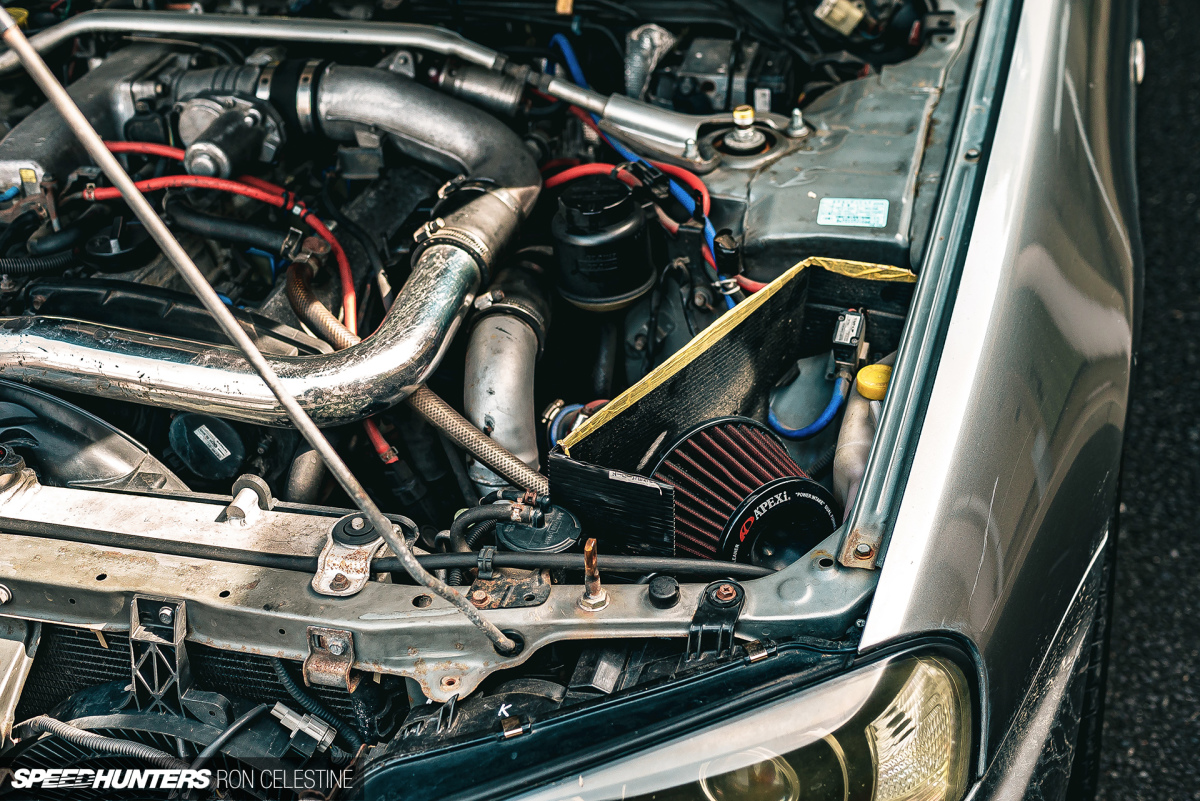
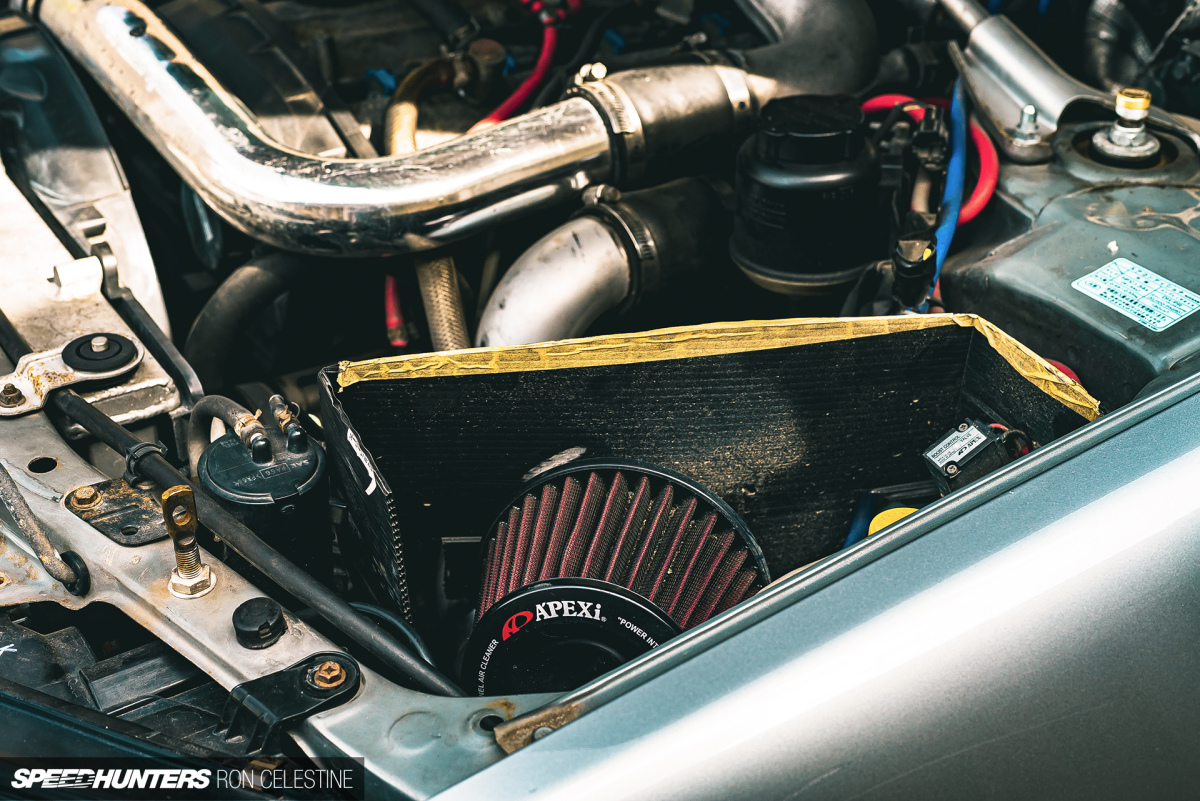
I'm sure you'll agree that it's lot better than the plastic separator originally fitted. Of course, the function aspect of the airbox needed to be present for this to be a true success in my eyes.
I won't say that it's a huge gain, but it does seem like the turbo is spooling up a little faster now, though I want to build either a ramp or tube to really create a ram-air effect. An added unexpected bonus is that the turbo fluttering sound that occurred when the boost wasn't high enough to trigger the blow-off valve is now amplified. Since the blow-off valve is set to try and minimize lag, the fluttering only occurs at low vacuum levels. Sure, it's not the loud stutututu that fills every corner of YouTube, but something that puts a smile on your face when you get it just right.
If you're keen on learning a bit more detail on what I did with this DIY project, let me know in the comments. I plan on building a lot of things for Project Rough, and although this was one hell of a learning curve, I'm hooked.
Ron Celestine
Instagram: celestinephotography
Source: http://www.speedhunters.com/2019/10/building-diy-carbon-fiber-airbox-project-rough/
0 Response to "Easy Composites Ltd Arbon Fiber Airbox Pt 1"
Post a Comment